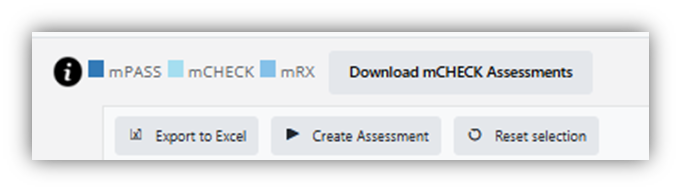
From the Assessment List, you can create a new assessment by clicking the “Create Assessment” button on the top left of the screen:
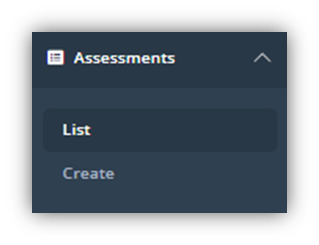
You can also click the “Create” button in the sidebar, as shown above. Doing so will bring you to the Create Assessment page.
You will be shown the screen below; include the information as relevant:
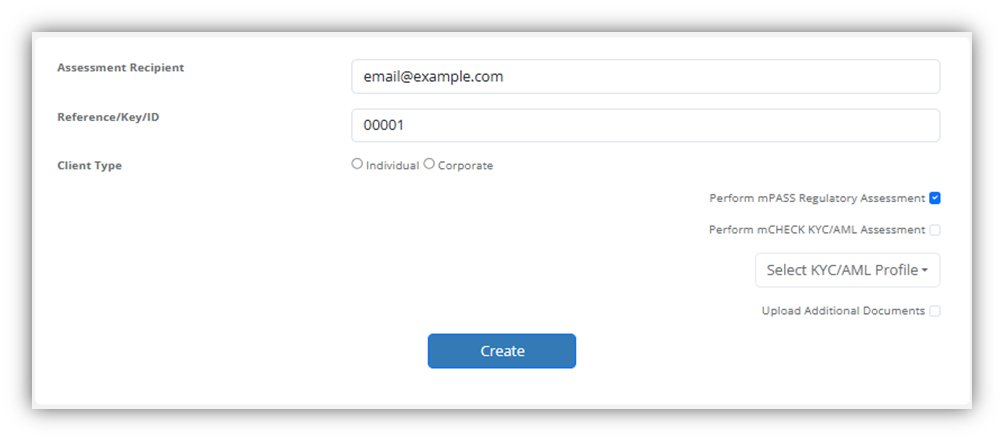
Here is an explanation of the different fields on this screen:
Assessment Recipient: The person intended to complete the assessment. If you have enabled the “Email Invitation” option, then including an email address in this box will prompt the system to send that address an email. The email will include a link to complete the assessment. Otherwise, the system takes no action on this, but will add the assessment to the Assessment List.
Reference/Key/ID: An internal reference number or code. It is not unique, so you can have multiple assessments with the same key.
Client Type: Determines the type of client journey that is initiated. Click the appropriate box depending on the type of the client.
Perform mPASS™ Regulatory Assessment: Checking this box will add the mPASS™ Regulatory Classification questions to the journey. To remind, the mPASS™ module can determine a client’s category (retail, professional etc.), and if the financial services and products they wish to be provided with are suitable / appropriatefor them, based on their knowledge & experience, financial situation, investment objectives etc.
Perform mCHECK™ KYC/AML Assessment: Checking this box will trigger the mCHECK™ KYC/AML module. You will then be asked to select a KYC/AML Profile, which will determine the type of checks, questions etc. added to the journey. These questions cause you to input and verify the information identifying the client. It is not ticked by default.
Select KYC/AML Profile: This dropdown reveals the available KYC Profiles for your Environment. The KYC Profile determines the KYC/AML checks that are performed by the system in the course of an assessment.
Upload Additional Documents: Appends a series of additional document upload questions, determined by the list of documents configured in the Request Additional Documents screen.
After you fill out the information in this screen, click the “Create” button. Return to the Assessment List and you will be able to take the assessment.